How To Save Multiple Attachments With Microsoft Outlook: A Quick Guide
Dealing with multiple email attachments can be tedious, especially when saving them all simultaneously. Microsoft Outlook offers users a convenient solution for efficiently managing and saving multiple attachments. This article will guide you through the process and various methods of saving multiple attachments using Microsoft Outlook.
Whether you’re a professional who frequently receives essential documents via email or an individual who likes to keep their inbox neat and organized, managing your attachments is an essential part of a well-maintained email experience. By understanding how to save multiple attachments, you’ll improve your productivity and have easier access to your needed files.
Key Takeaways
- Learn how to save multiple attachments in Microsoft Outlook efficiently
- Discover both manual and automated methods for managing email attachments
- Explore how to configure attachment settings and organize saved files
Organize Your Inbox
Creating Folders
Organizing your inbox in Microsoft Outlook can significantly enhance your productivity. Start by creating folders to categorize your emails. To do this, follow these steps:
- Right-click on your Inbox and choose New Folder.
- Name the folder based on its purpose, such as ‘Projects,’ ‘Meetings,’ or ‘Personal’.
- Drag and drop relevant emails into their designated folders.
Now that you have created folders, you can quickly locate specific emails by navigating to the appropriate folder.
Setting Rules
Outlook also allows you to create rules that automatically sort incoming emails into specific folders. This will help keep your inbox organized. Here’s how to set up a rule:
- Click the Home tab and then select Rules > Create Rule.
- In the Create Rule dialog box, choose your desired condition(s) that trigger the rule, such as emails from a specific sender or with certain keywords.
- Choose the action(s) to be taken when the rule is triggered, such as moving the email to a specific folder.
- Click OK to save the rule.
These organizing tips will help keep your Microsoft Outlook inbox clutter-free, enabling you to work more efficiently and find important emails faster.
Save Attachments Manually
Individual Attachments
To save an individual attachment in Microsoft Outlook, follow these simple steps:
- Open the email containing the attachment.
- Locate the attachment at the bottom of the email.
- Right-click on the attachment.
- Choose Save As or Save All Attachments from the context menu.
- Select the desired location to save the attachment, and click Save.
Your attachment will now be saved to your chosen folder.
Multiple Attachments
If you want to save multiple attachments at once, follow these steps:
- Open the email containing the attachments.
- Locate the attachments at the bottom of the email.
- Click on one of the attachments to select it, then hold down the Ctrl key while clicking on additional attachments to select multiple files.
- Right-click on any of the selected attachments.
- Choose Save All Attachments from the context menu.
- In the new window, ensure all desired attachments are checked.
- Click Browse to select a save location.
- Click OK to save all selected attachments.
All selected attachments will be saved in the designated folder.
Utilize Outlook’s Save All Attachments Feature
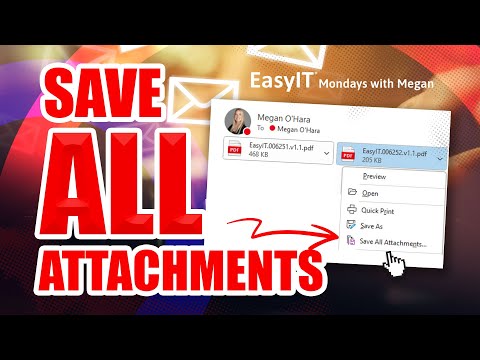
When you receive an email with multiple attachments in Microsoft Outlook, you can save time using the built-in Save All Attachments feature. This tool lets you download and save all attached files simultaneously instead of individually saving each.
First, open the email with the attachments you want to save to use this feature. Next, click the attachment icon in your Outlook window’s top right corner. From the drop-down menu, select Save All Attachments. A new dialogue box will appear, displaying a list of all attached files.
You can deselect any attachments you do not want to save in this dialogue box by unchecking their corresponding boxes. Once you have selected the files you want to save, click the Browse button to choose the destination folder to store the attachments. Finally, click the Save button to download and save the attachments to your chosen folder.
Utilizing the Save All Attachments feature in Outlook. You can efficiently manage and save multiple attachments, streamlining your workflow and increasing productivity. Remember to organize the saved files in an easy-to-find manner, such as creating specific folders for particular projects or clients, to help you stay organized in the long run.
Automate Attachment Saving
Microsoft Outlook offers various ways to automate attachment saving, enabling you to manage multiple attachments easily. This section will cover two methods: Outlook VBA script and third-party add-ins.
Using Outlook VBA Script
Outlook Visual Basic for Applications (VBA) scripting can provide a custom solution for saving multiple email attachments. To get started, follow these steps:
- Open Outlook and press Alt + F11 to open the VBA editor.
- In the editor’s window, click Insert > Module to create a new code module.
- Copy the following VBA script and paste it into the module:
Sub SaveAttachments()
    Dim objOL As Outlook.Application
    Dim objMsg As Outlook.MailItem
    Dim objAttachments As Outlook.Attachments
    Dim objSelection As Outlook.Selection
    Dim objFileSystem As Object
    Dim strFolderpath As String
    Dim strFile As String
    Dim i As Long

    On Error Resume Next

    Set objOL = CreateObject("Outlook.Application")
    Set objSelection = objOL.ActiveExplorer.Selection

    strFolderpath = "C:\Attachments\"
    Set objFileSystem = CreateObject("Scripting.FileSystemObject")

    If Not objFileSystem.FolderExists(strFolderpath) Then
        objFileSystem.CreateFolder (strFolderpath)
    End If

    For Each objMsg In objSelection
        Set objAttachments = objMsg.Attachments
        If objAttachments.Count > 0 Then
            For i = 1 To objAttachments.Count
                strFile = objAttachments.Item(i).FileName
                objAttachments.Item(i).SaveAsFile strFolderpath & "\" & strFile
            Next i
        End If
    Next

    Set objAttachments = Nothing
    Set objMsg = Nothing
    Set objSelection = Nothing
    Set objOL = Nothing
End Sub
- Modify the
strFolderpathvariable as needed to set your desired destination folder. - Save and close the VBA editor.
- In Outlook, select the emails containing the attachments you want to save.
- Press Alt + F8 to open the “Run Macro” window.
- Choose SaveAttachments, then click Run.
The script will save all attachments from the selected emails to the specified folder.
Third-Party Add-Ins
Various third-party add-ins are available to help with saving multiple attachments in Outlook. Some popular options include:
- Attachment Save for Outlook: This add-in automates the process of detaching, saving, and cataloging email attachments. It offers customizable settings, making it easy to manage multiple attachment files. Link
- Kutools for Outlook: Kutools adds multiple features to Outlook, including saving or detaching all attachments with just a few clicks. Link
To install an add-in, visit the respective product website and follow the installation instructions. Once installed, they typically provide an Outlook button or menu option to save multiple attachments quickly.
Configure Attachment Settings
When using Microsoft Outlook, it’s essential to configure attachment settings to save multiple attachments more efficiently. This section will walk you through changing the default save location for attachments.
Change Default Save Location
To change the default save location for attachments in Microsoft Outlook, follow these steps:
- Open Microsoft Outlook and head to the File tab.
- Click on Options to open the Outlook Options dialog box.
- In Outlook Options, navigate to the Save category on the left menu.
- Look for the Default location for saving attachments option.
- Click on Browse and select the folder where you want to save your attachments by default.
Customizing these settings allows you to save multiple attachments in your preferred location. Ensure you follow the steps outlined in this brief guide to achieve optimal file organization.
Managing Saved Attachments
A few key aspects must be considered when managing attachments saved from Microsoft Outlook. This section will cover how to organize your files and ensure their security.
Organizing Files
Proper organization of files is essential for efficient retrieval and workflow. To keep your saved attachments manageable, follow these tips:
- Create folders to categorize attachments by project, sender, or topic.
- Use clear and concise names for your folders and files to make them easy to locate.
- Delete duplicates and irrelevant files regularly to avoid clutter.
File Security
Keeping your saved attachments secure is vital, especially when dealing with sensitive or confidential information. Here are some steps to ensure file security:
- Enable password protection on sensitive files to restrict unauthorized access.
- Keep storage devices secure using encrypted services or external drives with built-in encryption.
- Backup regularly to avoid data loss from accidental deletion or hardware failure. Cloud-based services are a reliable option for offsite storage.
By reflecting on these practices, you can better manage your saved attachments in Microsoft Outlook and work more efficiently.