
Mastering iCloud Shared Albums on Your iPhone: A Comprehensive Guide
The Photos app is a treasure trove of memories for every iPhone user – a digital library that stores and organizes all your images and videos. What makes it even more remarkable is the functionality of Shared Albums. This feature allows you to share your photo collections with chosen ones and offers them the privilege of contributing their images, videos, and comments. Shared Albums works efficiently regardless of whether you’ve enabled iCloud Photos and My Photo Stream.
This comprehensive guide walks you through how to make the most of this feature.
Turning on Shared Albums
Activating Shared Albums is the first step to sharing your cherished memories with your loved ones. To do this, navigate to Settings > [your name] > iCloud > Photos, then enable Shared Albums.
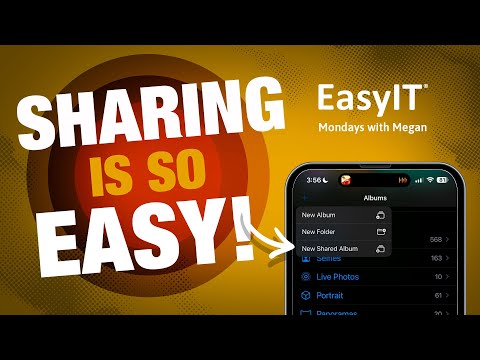
Creating a New Shared Album
Once Shared Albums are active, you can create a new album. To do this, tap on Albums, click the Add button, and then select New Shared Album. Label your album with a memorable name and tap Next. You can then select people to share the album with or manually enter an email address or phone number before hitting Create.
Enabling Public Viewing in iCloud
This feature allows you to share your albums publicly. Anyone with the URL can view your album if you choose to use it. To turn on public viewing, tap on Albums, select your favorite shared album, tap the Add Subscribers button, and enable Public Website.
Adding Content to a Shared Album
You might want to add photos and videos to your shared album in the spirit of shared memories. Access Albums, pick your shared album, and tap the Add button. Select the items you’d like to contribute, tap Done, add an optional comment, and then hit Post.
Managing Subscribers and Notifications
With your shared album now live, you can manage subscribers and notifications. Select the shared album, tap the Add Subscribers button, and then perform any of the following actions:
- Add subscribers: Click on Invite People and enter the names of the subscribers you wish to add.
- Remove subscribers: Select the subscriber’s name and then tap Remove Subscriber.
- Control notifications: Toggle the Notifications button on or off as desired.
Remember, subscribers can contribute photos and videos to the album. However, if you prefer to be the sole contributor, disable the Subscribers Can Post button.
Modifying and Deleting Content in a Shared Album
As the owner, you have control over the content of your shared album. To delete photos, videos, or comments, tap Select within the shared album, pick the items you wish to remove, and then click the Trash Can button. For deleting comments, hold the specific comment and then tap Delete.
Renaming a Shared Album
To give your album a fresh identity, you can rename it anytime. Scroll to Shared Albums within Albums, tap See All, then select Edit. Tap the album name and enter the new title.
Subscribing to a Shared Album
When invited to a shared album, accept the invitation through the iCloud notification or the invitation email. Remember, your iPhone must be connected to the internet to use Shared Albums. This feature operates on Wi-Fi and cellular networks, but be aware that data charges may apply when connected via a cellular network.
In conclusion, iCloud Shared Albums is an excellent feature for iPhone users, allowing them to share, collaborate, and keep their precious memories alive with their loved ones. By mastering these steps, you can enhance your photo sharing experience and make the most of your iPhone.