
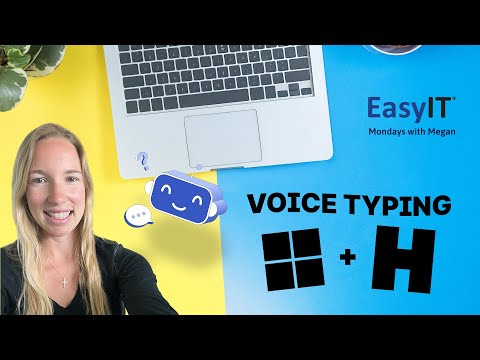
Using Windows + H Keys For Voice Typing Efficiently On Your PC
Using the Windows + H keys, you can quickly activate voice typing on your PC and dictate text instead of typing by hand.
Whether you want to save time or give your wrists a break, this shortcut offers a handy alternative to old-school typing. Voice typing comes built into Windows, and honestly, it’s surprisingly easy to start with just a quick key combo.
With a few tweaks in your settings, voice typing becomes even more accessible for daily use. If you want to make your workflow smoother, learning to use the Windows + H keys is a practical skill.
Key Takeaways
- You can use Windows + H to start voice typing quickly.
- Personalizing settings helps improve the voice typing experience.
- Addressing common issues and privacy settings supports smooth usage.
What Are the Windows + H Keys?
Windows + H allows you to start voice typing on compatible Windows devices. You dictate your text, and it shows up on screen, which can speed things up and reduce hand fatigue.
Overview of the Voice Typing Shortcut
Press the Windows logo and H keys together, and the voice typing toolbar pops up. This shortcut works in most text fields and supported apps, so you can start talking immediately.
You’ll see a microphone button and some basic controls—nothing complicated. Voice typing relies on built-in speech recognition, turning your spoken words into text in real time. It’s great for emails, jotting down notes, or filling out forms without touching the keyboard.
Automatic punctuation helps keep your text readable, so you don’t have to add periods and commas manually. You can start or stop dictation by using the shortcut again or by clicking the mic button on the toolbar.
The microphone stays off until you hit the shortcut or tap the icon. Sometimes, Windows will show a few tips to help you get started. For privacy, Windows always lets you know when your mic is listening.
For step-by-step instructions and more settings, check out Microsoft’s page on using voice typing.
Compatibility Across Windows Versions
Windows + H works on Windows 10 and Windows 11. On Windows 10, it’s called “dictation,” and on Windows 11, you’ll see it labelled as “voice typing.”
With an internet connection, you’ll get better accuracy, since cloud processing helps with speech recognition. The shortcut works with most physical keyboards, and if you’re on a tablet or touchscreen, you’ll find a mic icon near the spacebar on the touch keyboard.
This means you can use voice typing on a bunch of different devices. Older versions like Windows 8 don’t support this shortcut. Speech recognition is still around in those, but it’s clunkier and doesn’t tie in with keyboard shortcuts as smoothly.
Ensure your system is updated if you want the latest voice typing features. Language and region settings can also affect compatibility. You might need to download extra speech packs for certain languages, but that lets you dictate in more than one language if you need to.
How To Use the Windows + H Keys for Voice Typing
Voice typing in Windows can turn your speech into text fast. The Windows + H shortcut is a simple way to get started with dictation, set permissions, and control when dictation starts or stops.
Step-by-Step Activation Guide
Press the Windows logo key + H on your keyboard to kick things off. The voice typing toolbar appears at the top of your screen.
Click on any text field—Word, Notepad, browser, or whatever. If nothing pops up, double-check your system settings or make sure Windows is up to date.
If you’re on a touch device, look for the mic icon by the spacebar. Tapping that works, too. Need more help? Here’s a detailed setup guide.
Enabling Microphone Permissions
Before voice typing can work, Windows needs access to your microphone. Go to Settings > Privacy > Microphone and ensure you’ve turned on mic access for your device and the apps you want.
If Windows can’t find your mic, you’ll get a prompt to turn on permissions. Just follow the instructions. It’s smart to test your mic and check for any hardware hiccups.
You can tweak speech and voice activation privacy options from the main privacy dashboard. That way, you can control how your voice data is used. For more on this, Microsoft’s privacy resources have the details.
Starting and Stopping Voice Typing
Once permissions are ready, press Windows + H to fire up voice typing. A mic icon shows up, so you know it’s ready to listen.
Speak clearly and at a normal pace. Dictation starts as soon as you begin talking. Just click the mic icon or hit Windows + H again to pause or stop.
If you go quiet for a bit, Windows might stop listening. To start again, use the shortcut. For more hands-free tricks and tips, check out the KnowBrainer forum.
Configuring Voice Typing Settings
You can make voice typing work better for you by tweaking language and speech settings. A good setup means better accuracy and a more personal experience.
Selecting Input Language
Picking the right input language makes a big difference. Open Settings, then head to Time & Language > Language & Region.
Add new languages or set your favorite for voice input. Sometimes you’ll need to download speech packs. Make sure your mic works with the language you pick.
When you use Windows + H, voice typing uses your chosen language. If you want to switch, use the language bar on your taskbar or shortcut keys like Alt + Shift.
Customizing Speech Settings
You can tweak how voice typing behaves by changing speech settings. Open Settings, go to Privacy & Security > Speech, and turn on “Online speech recognition” for better results.
There are toggles for auto-punctuation and filtering out bad language. Auto punctuation drops in periods and commas as you speak, so you don’t have to. You can switch these on or off in the toolbar or Windows settings.
For accessibility, you can use voice commands like “delete,” “select,” or “new line.” Try different settings until you find what fits your workflow. If you want step-by-step visuals, the official guide is worth a look.
Tips for Effective Voice Typing
Using Windows + H for voice typing can boost your productivity. But you’ll want to optimize your setup and speaking to get the most out of it.
Improving Speech Recognition Accuracy
First, ensure your mic works well—test it in your Windows microphone settings. If it’s not picking up your voice clearly, try moving it or using a headset for better sound.
Pick a quiet spot to work. Background noise and echoes can mess things up. Clean your mic every so often to keep the audio clear.
Speak at a normal speed and enunciate. Don’t rush or mumble. If you’ve got other apps using your mic, close them to avoid conflicts.
If voice typing keeps messing up words, update your speech recognition settings. Windows offers troubleshooters and mic setup tools to help. For more advice, see the Microsoft support guide.
Using Voice Commands and Punctuation
Windows voice typing recognizes a bunch of commands for punctuation and editing. Say “period,” “comma,” or “question mark” to add those marks.
For a new line, say “new line” or “next line.” To erase text, use “delete” or “backspace.” Learning these commands helps you keep your hands off the keyboard.
The official Windows documentation keeps things updated for a complete list of commands. Practice the ones you use most to dictate faster with fewer hiccups.
Troubleshooting Common Voice Typing Issues
Sometimes, when you try to use Windows + H for voice typing, things don’t go as planned. Maybe your mic isn’t recognized, or the toolbar won’t appear.
Start by double-checking your device settings and permissions. Usually, a few troubleshooting steps will get things working again.
Microphone Not Detected
Start by checking your microphone’s physical connection. Is it plugged in securely? If you’re on Bluetooth, double-check that it’s paired and connected—sometimes it looks connected, but it’s not.
Now, let’s make sure your system’s using the right mic. Open up Settings > System > Sound.
- Under Input, pick your preferred microphone.
- Give it a quick test to see if it’s picking up your voice.
Don’t forget to let your apps use the mic. Head to Settings > Privacy & security > Microphone.
- Switch “Microphone access” to On.
- Allow desktop apps to access your microphone, too.
If you’re still stuck, try updating your audio drivers. You can also run the built-in troubleshooter for audio problems.
- Go to Settings > System > Troubleshoot > Other troubleshooters > Recording Audio.
For more details, Microsoft has a support page on troubleshooting microphone problems, which is pretty useful.
Voice Typing Not Activating
If Windows + H isn’t doing anything, check if your version supports voice typing. Not every version does, weirdly enough.
Windows 10 and 11 have it, but you might need the latest updates. Go to Settings > Windows Update and see if anything awaits you.
Double-check the shortcut. It’s Windows logo key + H. On touch keyboards, look for the little microphone icon near the spacebar.
Still nothing? Your language and region settings might be the culprit. Open Settings > Time & Language > Speech.
- Pick a supported language for speech recognition.
Sometimes, another app hogs the mic, or a privacy tool blocks it. It’s worth a look.
If all else fails, check for error messages. You can also create a temporary new user account to see if voice typing works there. Microsoft has a step-by-step guide for voice typing if you want to dig deeper.
Advanced Features and Accessibility
Windows voice typing isn’t just basic—it has some neat extras for power users and anyone needing more accessibility support. Custom shortcuts and built-in aids can boost productivity if you use them correctly.
Dictation Shortcuts
Sure, Windows + H gets you started, but there’s more. You can say “delete that” to erase your last phrase, or “select all” to highlight everything. Even basic punctuation works—say “period” or “comma.”
Here are some handy voice typing commands:
- New Line: “New line”
- Delete: “Delete” or “backspace”
- Move Position: “Go to the end of the sentence.”
- Punctuation: “Question mark,” “Exclamation point”
Honestly, these shortcuts make dictation way smoother, especially for long emails or documents. If you want the full list, Microsoft’s support docs cover it.
Voice Typing for Accessibility Needs
Voice typing really helps if you have mobility or dexterity challenges. Just hit Windows + H and control text input by speaking instead of typing.
Some nice accessibility perks: you get live feedback as you talk and don’t need much setup. You can even enable automatic punctuation if you’d rather not say each mark out loud.
It also works with screen readers and other assistive tech, so you’re not locked out if you use those tools. For more privacy and compatibility, check out Microsoft’s official page about speech, voice activation, and privacy.
Privacy and Security Considerations
When you use voice typing with Windows + H, your words get sent to the cloud for conversion. Microsoft’s servers process your speech, which can spark a few privacy concerns for some folks.
You can tweak your speech and voice activation privacy settings by heading to Settings > Privacy & security > Speech. There, you’ll see what data gets collected and decide which features you want on or off. If you want the nitty-gritty, Microsoft has a complete guide here: Speech, voice activation, inking, typing, and privacy.
Key Privacy Tips:
- Always lock your device or sign out when you’re not using it to block unwanted voice input.
- If you’re uneasy about your data heading online, maybe turn off online speech recognition.
- Don’t forget to check and clear your voice activity history in your Microsoft account now and then.
| Option | What it Does | Where to Find |
|---|---|---|
| Online speech recognition | Processes voice data in the cloud | Privacy & security > Speech |
| Voice activity history | Let’s you review or delete stored voice data | Microsoft account online |
| Disable voice typing | Prevents further data from being sent | Privacy settings |
If you speak sensitive information out loud, the system might capture and process it. So, it’s probably best to use voice typing only in private spaces and avoid dictating anything confidential in public or shared areas.